In this guide, I’ll show how AI can remove clothes from a test image. For the example, I’m using AINudez, and the whole process is shown on pre-generated images of clothed AI girls — these are not real photos of real people.
If you want to compare different tools instead of following one example, see our main ranking: best AI undress tools. It is a better place to compare features, limits, privacy, pricing, and the overall level of risk before choosing a service.
Important Before Uploading a Photo
Tools like this should only be used with images you have the right to process: your own images, synthetic images, test images, or material where there is clear consent. Not every platform allows real-person photos, and rules can vary by country, content type, and service.
Before uploading an image, check the terms of service, privacy policy, file-deletion options, rules for real-person images, and restrictions on publishing the result. Even if a service technically allows an upload, that does not automatically mean the use is legal, safe, or allowed by the platform’s rules.
1. Registration and Setup

For this test, I prepared several images in advance. They are not real photos of girls; they are AI-generated pictures created with a virtual character generator. This is a safer way to demonstrate the workflow because the guide explains how the tool works without using photos of real people.
First, sign up or log in to your account. Some services offer quick login options such as Google sign-in, but it is still worth checking what data the platform collects and how it handles uploaded images before using it.
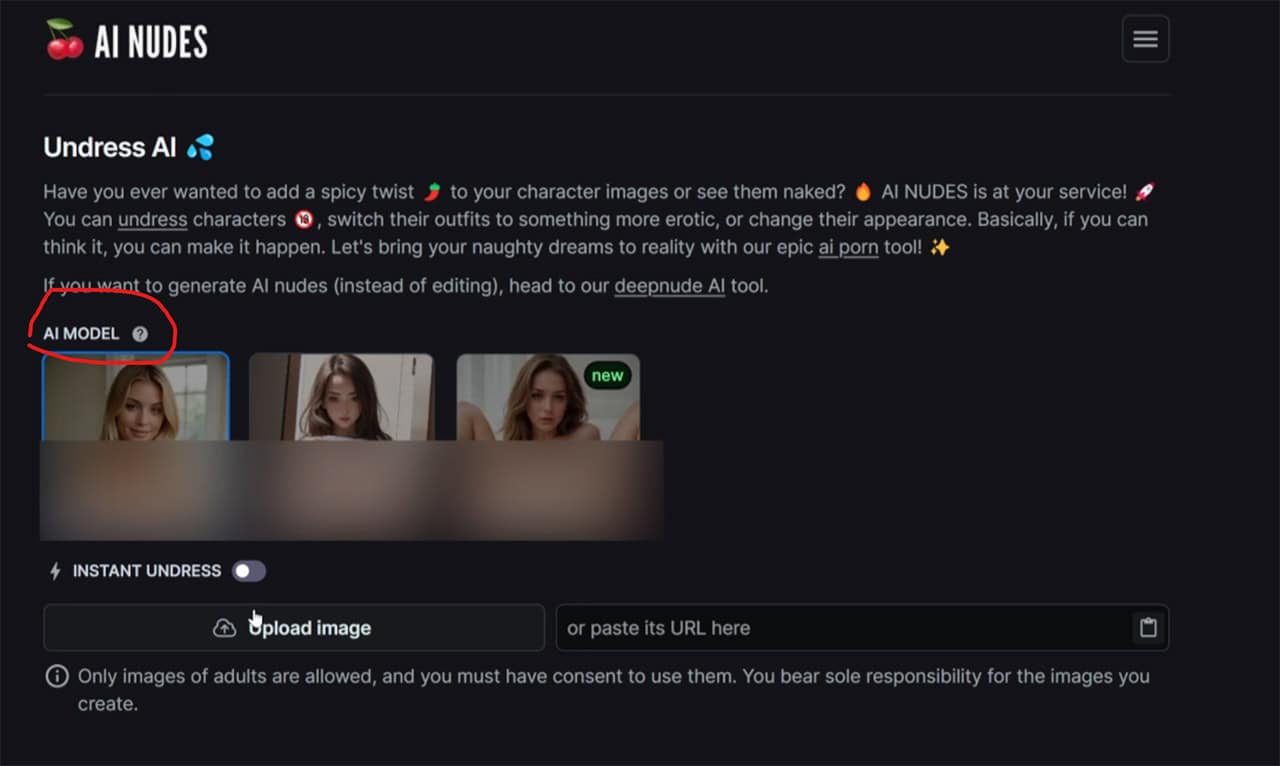
After logging in, you’ll enter the generation interface. In most tools, you can choose a model or processing style, upload an image, and, if needed, manually mark the clothing area. Some AI tools try to detect clothing automatically, but manual marking can help when the image has a difficult angle, unusual clothing, or many background details.
2. Removing Clothes and Enhancing the Image with AI
In the next step, the service usually lets you choose a processing mode or briefly describe the result you want. For this demonstration, I used a test scenario on a pre-generated image. If you repeat the process, it is better to start with synthetic or permitted images rather than photos of real people.
After starting the generation, wait for the AI to process the image. Processing time depends on the service, current load, source-file quality, and selected settings. The result may look convincing, but it should not be treated as a real image: it is a generated interpretation, not a reconstruction of what is actually under the clothing.

If the output looks too soft or lacks detail, you can try an enhancement or upscale feature if the service provides one. These tools may improve sharpness, detail, and resolution, but they can also change the face, body proportions, background, or small image details.

One thing I noticed during the test was that the girl’s face changed slightly after enhancement. This is common with AI image tools: during upscaling or repeated processing, the model may partly redraw the image instead of only improving it. If keeping the original character’s appearance matters, compare several outputs or skip extra enhancement steps.
3. Testing Complex Photos and AI Limitations

On more complex images, the result can be less predictable. For example, if the image has layered clothing, an unusual pose, a detailed background, or objects close to the body, the AI may misunderstand the scene and redraw parts of it incorrectly. In one test, the model failed to recognize part of the background and changed the position of the arm and nearby objects.

In another image, some body details looked unnatural. These errors are common, especially when the source image has complex lighting, body rotation, overlapping clothing, or an unusual camera angle. Regenerating the image may help, but it does not guarantee a better result.

The main takeaway is simple: these tools can quickly demonstrate how generative image editing works, but quality depends heavily on the source image and settings. The more complex the image, the higher the chance of distortions, anatomy errors, face changes, background mistakes, or unrealistic details.

Free Limits, Pricing, and Paid Features
Services in this category often use free trials, internal credits, paid packages, or subscriptions. But the terms can change quickly: the number of free generations, access to upscaling, processing speed, output quality, and download options may depend on the current plan, country, account status, and product version.
Before paying, check what the plan actually includes: number of generations, quality limits, refund policy, cancellation terms, and whether the service stores uploaded images. Do not rely only on promotional examples — it is better to test the tool first with a safe test image.
Where to Compare Other AI Clothes Removal Tools
An earlier version of this guide included a short list of additional services, but this market changes quickly: tools rebrand, remove features, change free limits, introduce new rules, or become less relevant. Keeping a separate service list inside a step-by-step tutorial can easily make the article outdated.
If you want to compare different options, use the dedicated Night Analytics ranking instead: best AI undress tools. It is a better place to evaluate not only the feature itself, but also privacy, pricing, restrictions, output quality, image-upload risks, and overall service fit.
Quick Checklist Before Using These Tools
- Use permitted images. It is safer to start with synthetic, owned, or test images rather than photos of real people.
- Check the service rules. Some platforms restrict real-person images, public figures, minors, third-party photos, or content without consent.
- Review privacy settings. Check whether uploaded files are stored, whether you can delete history, and whether content may be used for training or moderation.
- Do not treat the output as factual. AI does not “see” the body under clothing; it creates a new image based on learned patterns.
- Be careful with publishing. Even a synthetic result can create reputational, legal, or ethical risks if it resembles a real person.
FAQ
Can AI remove clothes from any photo?
Some services technically allow different types of image uploads, but real-person photos should only be used according to the service rules, the consent of the person shown, and the laws in your country. For testing, synthetic or permitted images are safer.
Why does the result sometimes change the face or background?
AI often redraws part of the image rather than editing only one area. As a result, the face, hair, hands, background, lighting, or body proportions may change during processing.
Is the result a real image of the person without clothes?
No. It is a generated image, not a real reconstruction of the body under clothing. The output may look convincing, but it remains an artificial interpretation created by the model.
Where can I choose the right tool for this?
When choosing a service, look beyond sample quality and check privacy, pricing, limits, image-upload rules, and file-deletion options. Night Analytics compares these tools separately in the dedicated ranking: best AI undress tools.
Conclusion
AI clothes removal tools can quickly demonstrate how generative image editing works, but the result depends on the source image, settings, model quality, and rules of the specific platform. On synthetic test images, these tools can be useful for demonstration, but real-person photos require much more caution.
Before using a service, check its rules, privacy policy, consent requirements, local laws, and payment terms. And if you need to choose a tool, start with the main Night Analytics ranking, where these services are compared separately instead of being mixed into a step-by-step tutorial.